M Baas
I am a machine learning researcher at Camb.AI. I post about deep learning, electronics, and other things I find interesting.
Danbooru2018 pytorch pretrained models
by Matthew Baas
Pretrained PyTorch Resnet models for anime images using the Danbooru2018 dataset.
TL;DR:
- Resnet50 trained to predict tags in the top 6000 tags, age ratings, and scores using the full Danbooru2018 dataset.
- Resnet34 trained to predict tags in the top 500 tags using the 36GB Kaggle subset of the Danbooru2018 dataset.
- Resnet18 trained to predict tags in the top 100 tags using the 36GB Kaggle subset of the Danbooru2018 dataset.
- Associated GitHub repo
Results

The models were trained using 90% of the Danbooru2018 dataset (or the 36GB Kaggle subset), with the remaining 10% being used for validation. Note: the data was split at random, using a seed of 15 for np.random.seed() (see training notebook for how to reproduce the exact split).
The results for each network are shown in the table below, with the metrics being evaluated from the validation set.
| Model | Cross entropy loss | Accuracy (0.4 threshold) | F2 score (0.4 threshold) | #tags |
Training time | GPU |
|---|---|---|---|---|---|---|
| Resnet18 | 0.2793 | 0.8980 | 0.2827 | 100 | ~2 days | 1 Tesla K80 |
| Resnet34 | 0.1147 | 0.9665 | 0.3307 | 500 | ~2 days | 1 Tesla K80 |
| Resnet50 | 0.0137 | 0.9964 | 0.3831 | 6000 | ~7 days | 1 Tesla V100 |
For best results please use the Resnet50 model, since it is trained on the full dataset and generally performs much better. The #tags is the number of most popular tags (in the dataset) that the networks were trained to predict. e.g #tags being 6000 means the networks were trained to predict tags using the top 6000 most frequently occurring tags in the Danbooru2018 dataset.
Note that since the number of tags that each model is trained with is different, comparing their metrics is not straightforward, however qualitatively the resnet50 model performs significantly better than the other two.
Resnet50 bonus features
The resnet50 model has the age rating treated as a tag, so the resnet50 model doubles up as a ‘safe’/’questionable’/’explicit’ classifier using the corresponding tags of age_raitng_s, age_rating_q, age_rating_e.
The score attribute of each image in the Danbooru2018 metadata is also treated as a tag, having the set of associated tags meta_score_x where x is the score from 1-5 (e.g images with a score: 5 in the metadata will have the tag meta_score_5). Although I have found this feature to not be particularly effective just yet.
Getting started
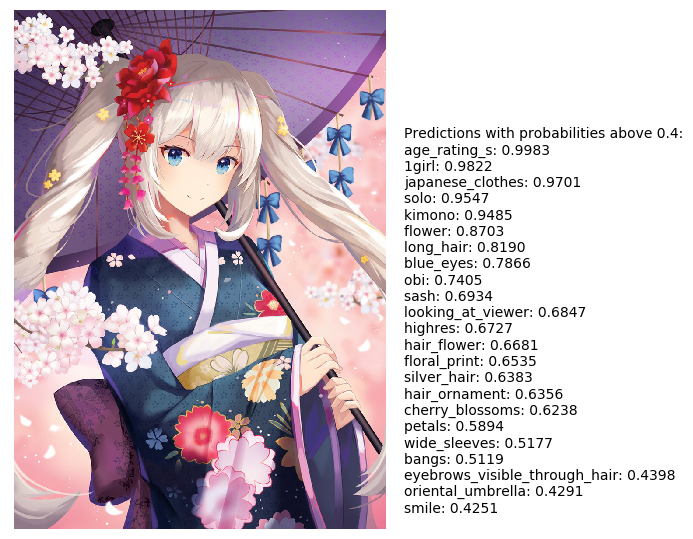
First we download a sample image to try on
import urllib, urllib.request
url, filename = ("https://github.com/RF5/danbooru-pretrained/raw/master/img/egpic1.png", "egpic1.png")
try: urllib.URLopener().retrieve(url, filename)
except: urllib.request.urlretrieve(url, filename)
1. The pure pytorch way
PS: this can be done out of the box in google colab, or any python environment with pytorch installed.
import torch
model = torch.hub.load('RF5/danbooru-pretrained', 'resnet50')
# or
# model = torch.hub.load('RF5/danbooru-pretrained', 'resnet18')
# or
# model = torch.hub.load('RF5/danbooru-pretrained', 'resnet34')
model.eval()
All pre-trained models expect input images normalized in the same way,
i.e. mini-batches of 3-channel RGB images of shape (3 x H x W), where H and W are expected to be at least 64.
The images have to be loaded in to a range of [0, 1] and then normalized using mean = [0.485, 0.456, 0.406]
and std = [0.229, 0.224, 0.225] for the resnet18/resnet34 models, and a mean = [0.714, 0.663, 0.652]
and std = [0.297, 0.302, 0.298] for the resnet50 model.
Here’s a sample execution using the example resnet50 model and the image from earlier:
from PIL import Image
import torch
import torch.nn.functional as F
from torchvision import transforms
input_image = Image.open(filename)
preprocess = transforms.Compose([
    transforms.Resize(360),
    transforms.ToTensor(),
    transforms.Normalize(mean=[0.7137, 0.6628, 0.6519], std=[0.2970, 0.3017, 0.2979]),
])
input_tensor = preprocess(input_image)
input_batch = input_tensor.unsqueeze(0) # create a mini-batch as expected by the model

if torch.cuda.is_available():
    input_batch = input_batch.to('cuda')
    model.to('cuda')

with torch.no_grad():
    output = model(input_batch)

# The output has unnormalized scores. To get probabilities, you can run a sigmoid on it.
probs = torch.sigmoid(output[0]) # Tensor of shape 6000, with confidence scores over Danbooru's top 6000 tags
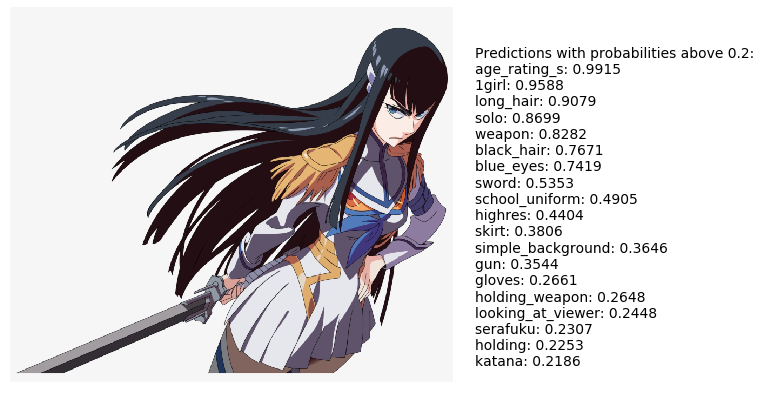
We can now plot the outputs next to the input image
import matplotlib.pyplot as plt
import json

with urllib.request.urlopen("https://github.com/RF5/danbooru-pretrained/raw/master/config/class_names_6000.json") as url:
    class_names = json.loads(url.read().decode())

plt.imshow(input_image)
plt.grid(False)
plt.axis('off')

def plot_text(thresh=0.2):
    tmp = probs[probs > thresh]
    inds = probs.argsort(descending=True)
    txt = 'Predictions with probabilities above ' + str(thresh) + ':\n'
    for i in inds[0:len(tmp)]:
        txt += class_names[i] + ': {:.4f} \n'.format(probs[i].cpu().numpy())
    plt.text(input_image.size[0]*1.05, input_image.size[1]*0.85, txt)

plot_text()
plt.tight_layout()
plt.show()

2. The fastai way
If you already have fastai installed, you can use their load_learner() function after downloading the exported model of your choice from the github release page:
from fastai.vision import *
# if you put the resnet50 file in the current directory:
learn = load_learner(path='./', file='fastai_danbooru_resnet50.pkl')
# or any of these variants


model = learn.model # the pytorch model
mean_std_stats = learn.data.stats # the input means/standard deviations
class_names = learn.data.classes # the class names

# Predict on an image
img = open_image('egpic1.png')
predicted_classes, y, probs = learn.predict(img)
print(probs)
>> tensor([1.0000e+00, 1.0000e+00, 2.2001e-13,  ..., 0.0000e+00, 0.0000e+00,
        0.0000e+00])
Training
- Trained with PyTorch and fastai
- Multi-label classification using the top-100 (for resnet18), top-500 (for resnet34) and top-6000 (for resnet50) most popular tags from the Danbooru2018 dataset.
- The resnet18 and resnet34 models use only a subset of Danbooru2018 dataset, namely the 512px cropped, Kaggle hosted 36GB subset of the full ~2.3TB dataset.
- The resnet50 use the full ~2.3TB uncropped dataset. Unfortunately I lack the resources for training the other resnet models on the full dataset or for training the models to their absolute limits. If I one day acquire the resources or AWS/GCP credits required I will probably update this with more networks trained on the full dataset and trained for longer.
Training procedure
Training was done using the various tricks of the fastai library, namely:
- The learning rate was set using the One Cycle Policy using fastai’s
fit_one_cycle()function. - The training images had several transforms applied, including random rotations, zooms, warps, brightness, contrast, and left/right mirroring.
- Images were progressively resized. Training started using 64x64 sized images and a batch size of 512, being slowly annealed upwards until the final epoch of training using images of the full 512x512 for the resnet18/resnet34 models and 360x360 for the resnet50 model. For this reason I often find it best to resize whatever input images you intend to use to 360x360 (for the resnet50 model) or 512x512 (for the other two models) for best performance. Again, if resources permitted, I would continue training them for a few more epochs at even larger resolutions, since a large portion of the Danbooru2018 dataset is of fairly high resolution.
- The resnet50 model was trained for the first few epochs using mixed precision training with
fp16for a pretty decent speedup. See fastai’s docs on it for details.
Networks
The networks are all standard Resnets with the network’s body defined the same as the torchvision.models definition.
Each model consists of a body, the output of which is fed into a ‘head’ network which predicts the final tags. For each resnet, the body is the full resnet except the last 2 layers, which are removed since they are specific to the 1000 ImageNet classes. In particular the final pooling and linear layer are removed and replaced by a head to accommodate for the 100, 500, or 6000 tag outputs. Specifically, the original last two layers (the non-convolutional part) of torchvision’s ResNet models:
  (avgpool): AdaptiveAvgPool2d(output_size=(1, 1))
  (fc): Linear(in_features=<some number>, out_features=1000, bias=True)
Becomes the following for the danbooru resnet models:
  (1): Sequential(
    (0): AdaptiveConcatPool2d(
      (ap): AdaptiveAvgPool2d(output_size=1)
      (mp): AdaptiveMaxPool2d(output_size=1)
    )
    (1): Flatten()
    (2): BatchNorm1d(<some number>, ...)
    (3): Dropout(p=0.25)
    (4): Linear(in_features=<some number>, out_features=512, bias=True)
    (5): ReLU(inplace)
    (6): BatchNorm1d(512, ...)
    (7): Dropout(p=0.5)
    (8): Linear(in_features=512, out_features=<#tags>, bias=True)
  )
For details see the Fastai create_head() function, which replaces these final two layers with an AdaptiveConcatPool2d (see this link for details) followed by a Flatten layer, fed into 2 rounds of batch normalization, dropout, linear, and ReLU. The first linear layer maps the number of final output features from the AdaptiveConcatPool2d to double the number of output activations of the body, and the second linear layer maps these activations to 512 activations, then a final linear layer is added which maps the 512 activations down to the final number of classes — #tags in the table.
Reproducing, comparing, and source code
For ease of training, I only used .png and .jpg image files, and not gifs or other format. Since processing all the labels into a nice usable form is in itself a reasonable amount of compute for the full dataset, I make the tag labels that I used during training for the top-6000 tag resnet50 available as a zipped csv at the link below:
With this together with the numpy seed used for the training and validation splits, is should be possible to get the exact same train/validation split. If you have any trouble getting it to work, please
- Check the notebooks in the GitHub repo – they are the ones I used to base my training/data preparation on.
- Contact me in the ‘About’ page.
The GitHub repo contains the class names for the various #tags. For example, the third output activation of the 6000-tag resnet 50 model corresponds to the score for the third tag in the class_names_6000.json file in the repo. The repo also has the source notebooks I used to train the networks and the full precision mean and standard deviation constants needed to normalize an input image.
Acknowledgements
- Thanks a ton for the organizers of the Danbooru2018 dataset! Their citation is:
Anonymous, The Danbooru Community, Gwern Branwen, & Aaron Gokaslan; “Danbooru2018: A Large-Scale Crowdsourced and Tagged Anime Illustration Dataset”, 3 January 2019. Web. Accessed 2019-06-24.
- For more info on the ResNet architecture, see Deep Residual Learning for Image Recognition
- Fastai for their super useful library.
Citing
If you use the pretrained models and feel it was of value, please do give some form of shout-out, or if you prefer you may use the bibtex entry:
@misc{danbooru2018resnet,
    author = {Matthew Baas},
    title = {Danbooru2018 pretrained resnet models for PyTorch},
    howpublished = {\url{https://rf5.github.io}},
    url = {https://rf5.github.io/2019/07/08/danbuuro-pretrained.html},
    type = {pretrained model},
    year = {2019},
    month = {July},
    timestamp = {2019-07-08},
    note = {Accessed: DATE}
}