M Baas
I am a machine learning researcher at Camb.AI. I post about deep learning, electronics, and other things I find interesting.
A simple 3D printed biltong dryer
by Matthew Baas
The design and construction of a portable biltong dryer.
TL;DR: Biltong is a well-known South African snack. I enjoy biltong, however, the biltong bought at the shops is often not the right level of dryness. One may even wish to dry their own biltong from scratch. So, I designed and constructed a simple biltong dryer with 3D printing and some basic components. If anyone is interested in a similar device, this post should give a good idea how to make it (along with CAD download links).
Post overview:
Like with previous 3D printed constructions, this post will go over the design in following steps:
1. Motivation
Biltong has a large variety, from different meats (e.g. beef/ostrich/kudu) to different levels of fat and different cuts. However, in the final consumer stages, one factor of key importance is how dry the biltong is. A visual idea of biltong dryness is given:
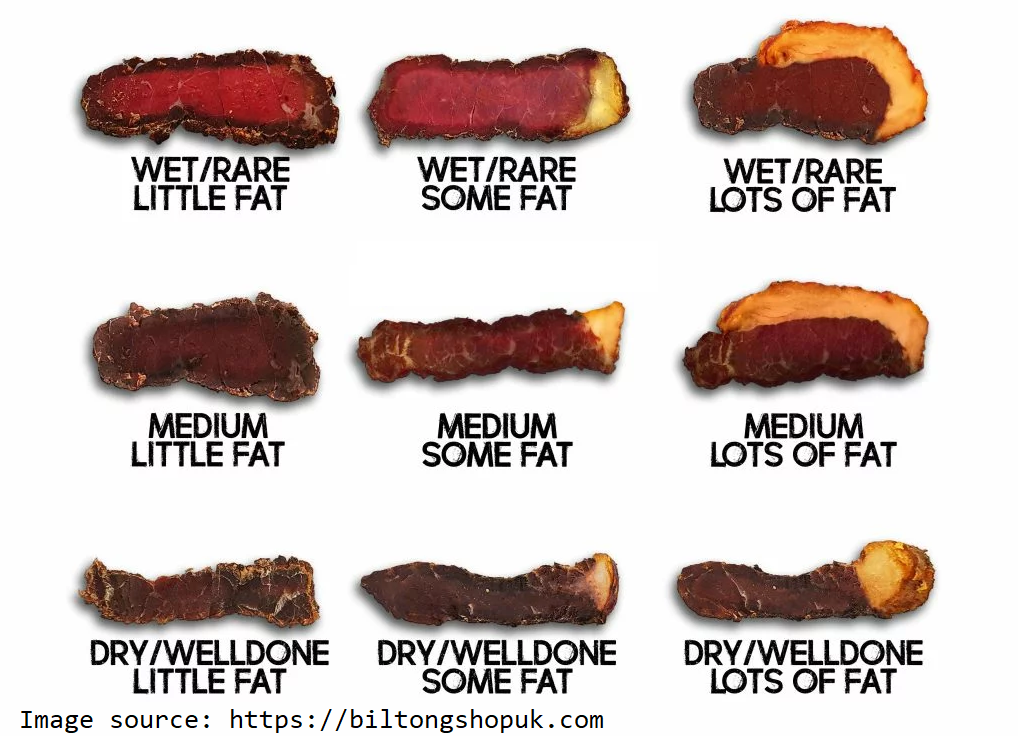
Like with steaks and other meats, everyone has their own ideal level of dryness, and often there is a mismatch between what is available in the shops and one’s ideal dryness. Hence, biltong dryers are fairly popular both for doing the final drying of sliced biltong (shown above) and whole cuts of biltong meat (i.e. pre-sliced).
Aside: one may ask why there is a mismatch between biltong suppliers’ dryness and consumer preferences. One plausible reason is that the incentives are mismatched because – like most produce – biltong is priced per unit weight. The reasoning from the supplier side goes like this:
- Biltong is priced per kilogram.
- Wet biltong is more dense (in terms of mass per unit volume) than dry biltong because of its increased water content.
- Therefore, wet biltong requires less actual meat (protein) per kilogram.
- Therefore, the cost of producing kilograms of wet biltong is cheaper than kilograms of dry biltong.
As a figurative example, if the meet from a cow used to make biltong fills some fixed volume. Curing and supplying that as wet biltong will make much more 1kg packets than if dry biltong was used instead, because wet biltong is more dense than dry biltong.
This is all to say, biltong suppliers have a cost incentive to supply the wetter biltong because it is cheaper to produce – meaning that consumers often want biltong a bit dryer than suppliers. Also, for the hardcore biltong people out there, curing one’s own biltong from while slabs of meat is preferable to drying pre-sliced biltong because they can then customize the spice and cut thickness/fat.
2. Objectives
Concretely, the objective is to make a simple, fully-functional biltong dryer that:
- Dries biltong quickly, but does not actually cook the biltong.
- Is small and portable.
- Is made designed using only open-source tools.
- Is made as cheaply as possible using regular consumer hardware (except for the 3D printer).
The bill of materials for this project:
- ~1kg PLA filament for 3D printing
- 2-part bonding glue / epoxy – note: this is only necessary if your 3d printer volume is less than 23cm x 23cm.
- 8x
M3 x 16mmscrews and hex nuts - 8x
M3 x 16mmsheet metal screws (M3 wood screws or other screws with a self-taper will also work). - A 5-20W AC fan 120mm in diameter. I used a 15W 120mm fan similar to this
- A screw-bulb socket/fitting similar to this – however adapting for other fittings is fairly easy.
- Incandescent screw-type bulb with power >50W. The South African government likes to ban these because they assume someone is going to buy a 100W lightbulb for regular lighting use over a 5W bulb (aren’t they so thoughtful to make the decision for us by nationally banning it?). So, this might be the hardest part to get ahold of. One good example is here.
- A 20cm diameter sieve. This will hold the sliced biltong. I used this one, however it is fine so long as it can hold biltong.
- Wires, basic on-off switch, solder.
- A cover for the dryer frame. This must just be a roll of material to stop air-flow – basically, you need something to wrap around the frame of the dryer to keep the warm air flow acting properly. I used a clear PVC roll of dimensions 41cm height and diameter 26cm (to fit over the frame’s 25cm). You can find good examples of this for order here. The one I used looks like this.
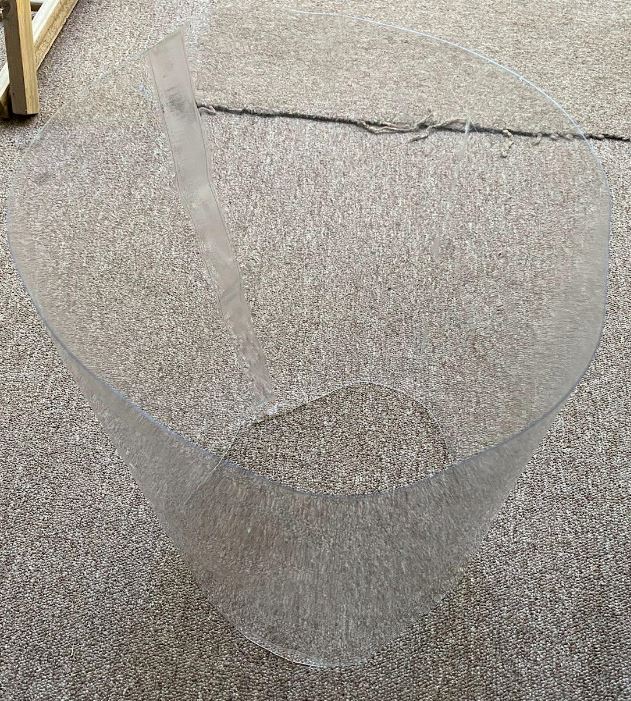
3. 3D modelling
As discussed in a previous post, using blender together with the CAD Sketcher plugin provides a fully functional open-source environment for CAD modelling. We will use this here aas well.
The overall design of the dyer is depicted in the following:
Figure: biltong dryer diagram

In short: it is a large cylinder, where intake air is warmed and dried with an incandescent bulb at the bottom. Then, the warm/dry air rises through the biltong held in a sieve in the cylinder, drying the biltong as it passes. The now relatively moist air near the top is vented out using the fan attached to a lid. This way, air is exhausted near the top, and the only other place air can be sucked in is the opening between the printed base and PVC cover near the bottom, effectively continuously funneling dry air over the biltong – drying it very rapidly!
Parts:
The printed components consists of 4 parts due to size limitations of the printer:
Part 1: the base to hold bulb and main supports
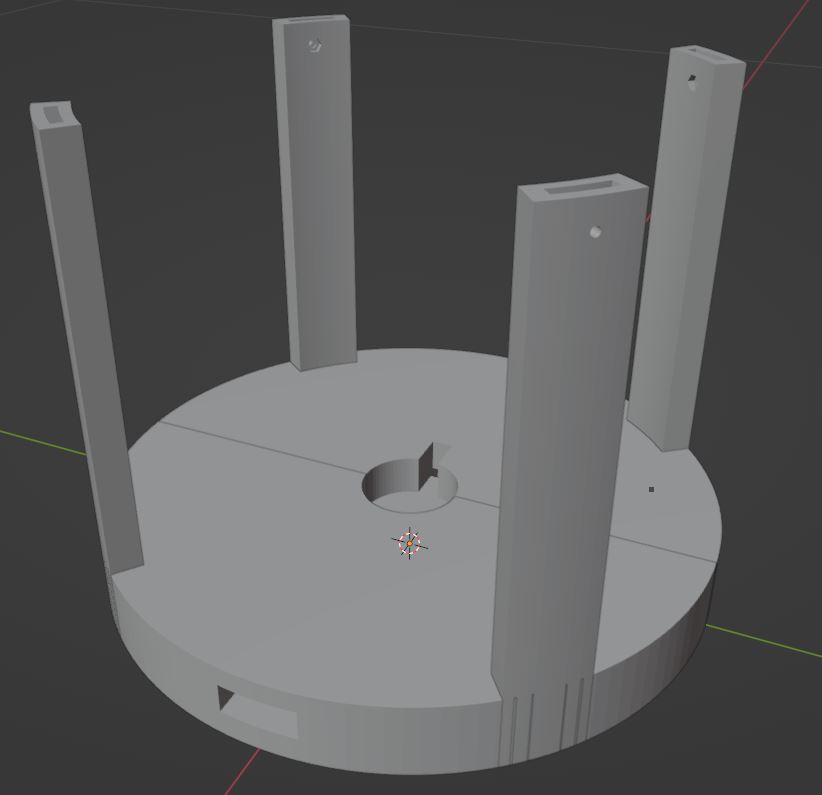
This ultimately sits at the bottom of the device and is what everything else rests on. One can see the inset in the middle for the light bulb holder. This is where – if you use a different kind of bulb fitting – you may need to modify the design. You can also see a dict in the bottom left where wires go between the bulb and outside switch.
At the top of each support one can also see the screw holes and insets to attach the next layer of the device, i.e.:
Part 2: the middle section of supports and sieve holder
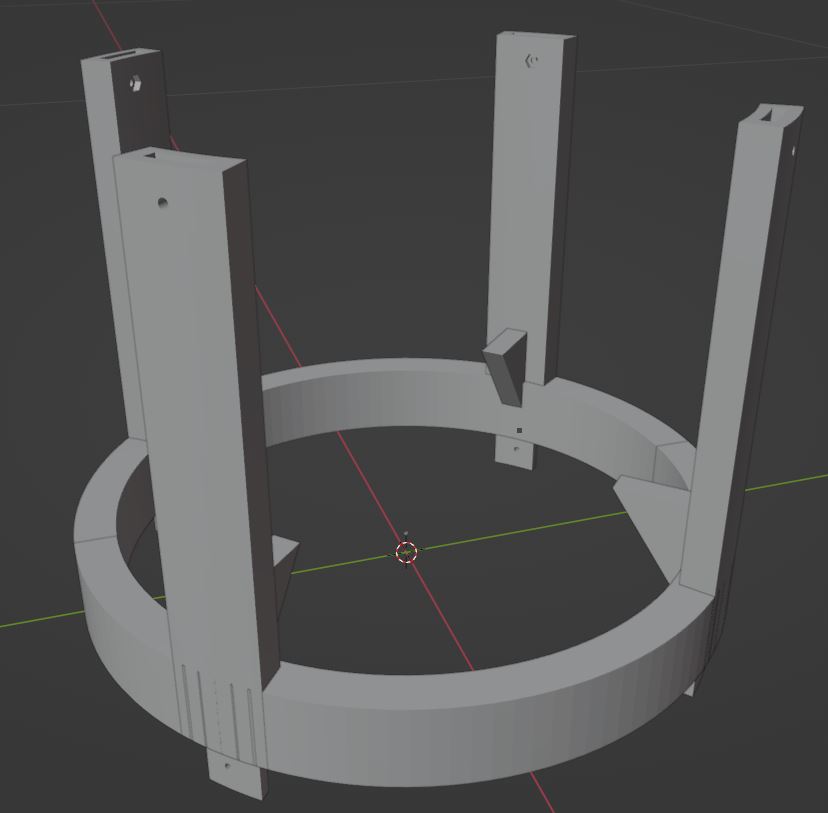
Here I have added the 4 little triangular prisms on which the sieve (holding the biltong) will rest. At the bottom are the extrusions and screw holes to attach to the base. The supports keep extending upwards to the top of the column:
Part 3 \& 4: the top of the device and the lid.
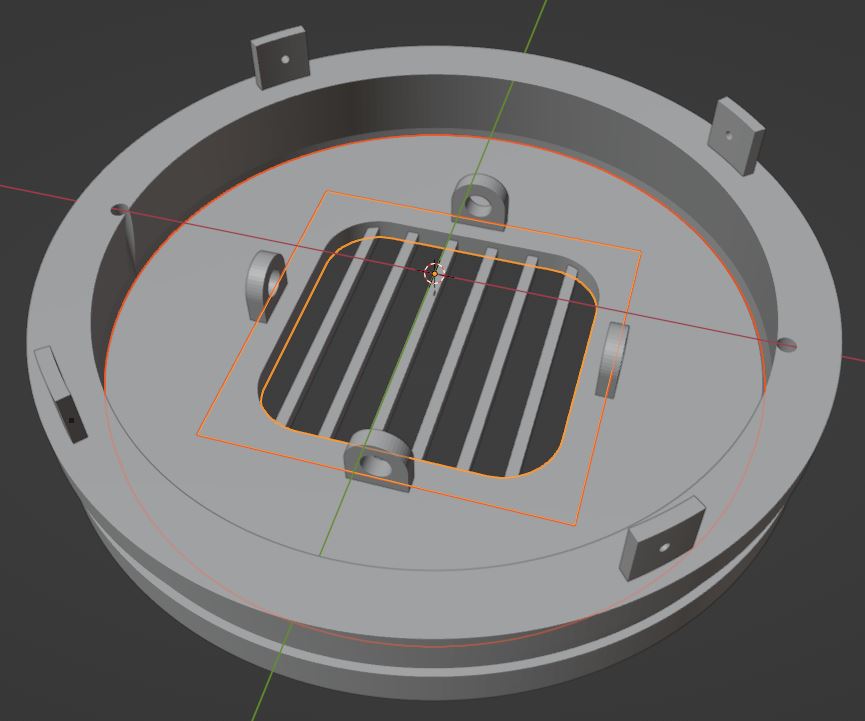
The figure above shows both the top of the stack and the lid (highlighted), both viewed from underneath (i.e. from what would be the inside of the cylinder). There are a few important considerations here:
- The lid has a fan grating to allow airflow through the fan (the
120mm x 120mmfan space is also outlined in light orange). - There are extrusions from the lid, each having a hole. This is to allow for hanging full slabs of unsliced biltong from the lid using a hook. In other words, it allows the same lid to be used either in the sieve configuration (in the earlier image), or in a secondary configuration with biltong slabs hanging on hooks without the sieve.
- The top has a groove along the outside, about 3mm deep and 1cm high. This is to allow us to clamp the PVC cover onto the top. This has the effect of both attaching it to the frame and to prevent air from entering/exiting on the rim of the lid. This way, air can only exit the top through the fan grating, enforced by the fan action. We clamp it with some thin bungee cord or even braided elastics.
To allow for printing tolerances and prevent other airflow from the edge of the lid, the rim of the top is slightly slopped:
Figure: close-up of dryer upper part (middle of image) and lid (top of image).
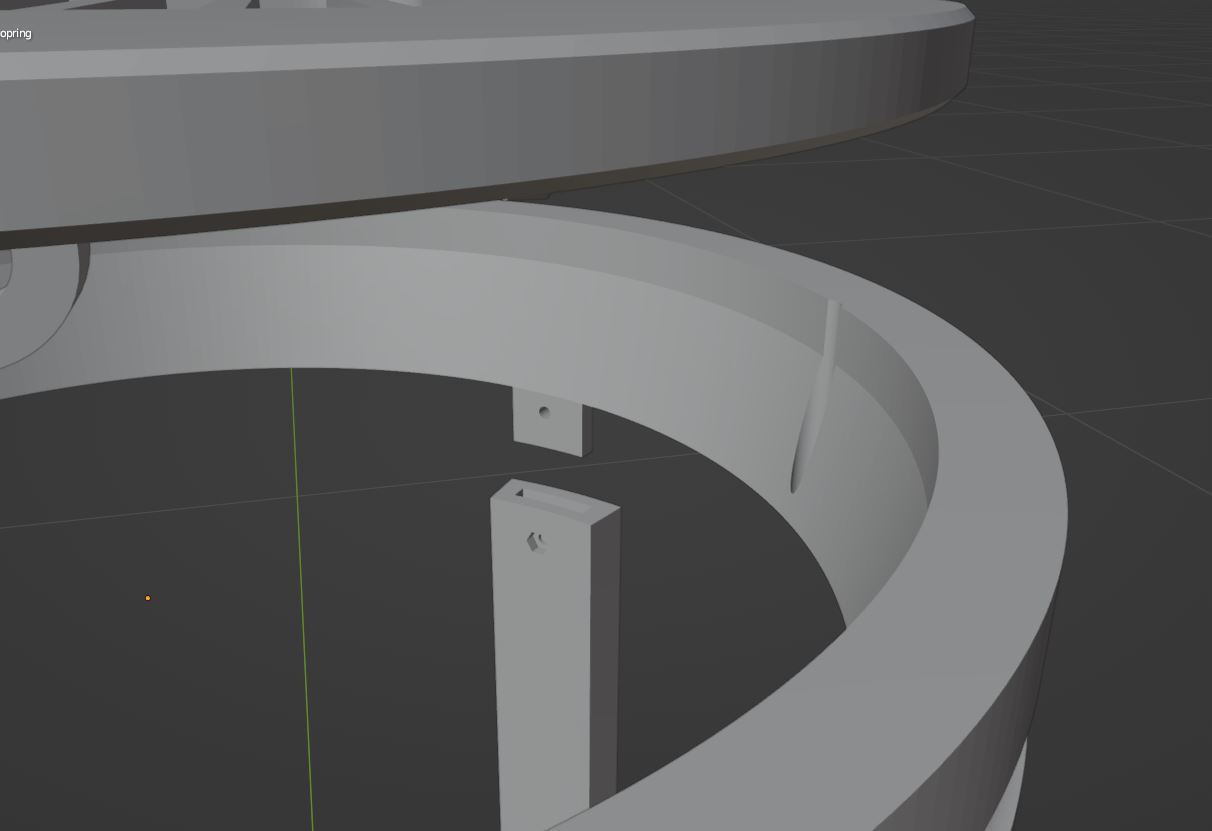
One can see two key design choices here:
- The inset for the lid to rest on is sloped, to allow for tolerances and to allow the user to push the lid firmly into the top until it is reasonably air-tight and firm.
- There is a small, ~4mm cylindrical cavity in the inner side of the top. This is to allow for neatly routing the wires from the fan to the switch/bulb circuit at the bottom.
When all these are put together in one screen, we can see the full biltong dyer exploded:
Figure: full biltong dryer model, exploded out to individually printed components.
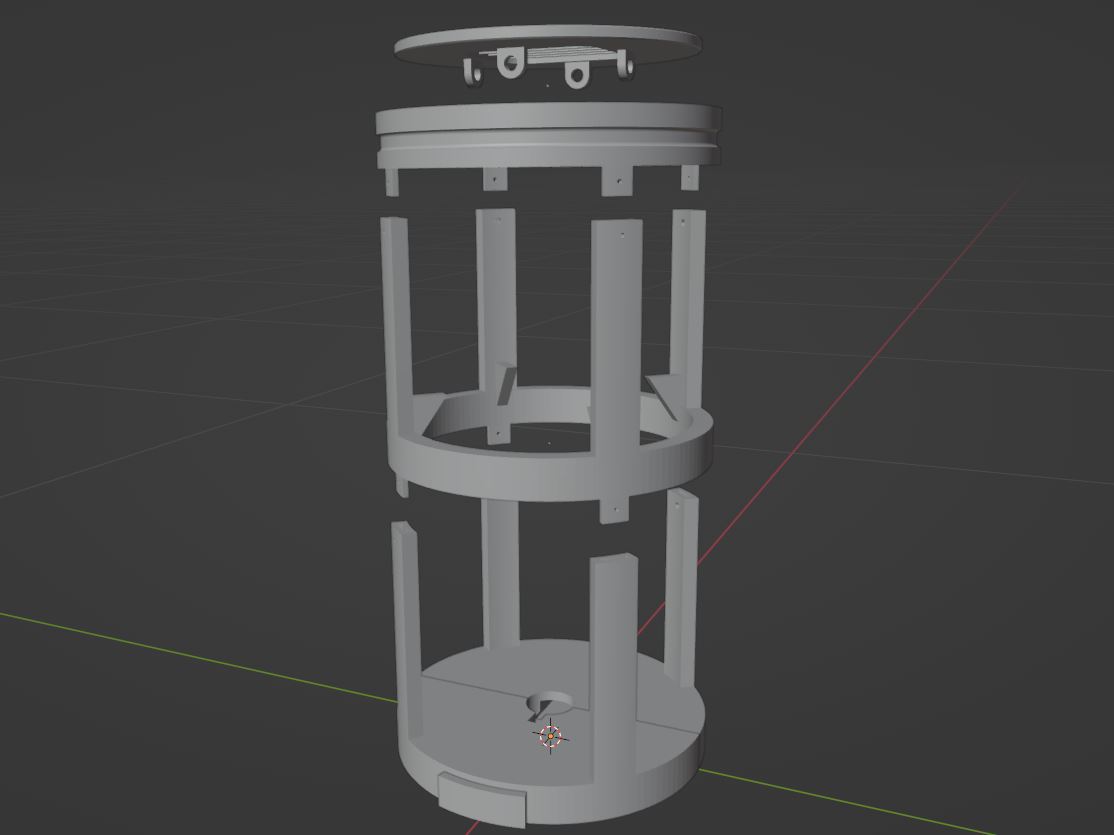
That’s it for the 3D modelling parts. I’ve supplied the blender model of all the parts here – feel free to use it how you wish. Next, on to construction.
4. Printing
The main hurdle in printing and construction is the print volume your 3D printer supports. Mine (the Prusa MK3S+) was not big enough to print the entire frame at once (the diameter was too big). So, each part I had to split into two, print each, and bond them together. For printing I used PrusaSlicer with a 25% infill for most parts.
I used the cut tool in PrusaSlicer to cut each part in half and add connectors between them for those parts too big to print in one go. Then, after printing, I clipped them together and glued the bonding surface with a 2-part epoxy/bonding agent. Specifically, I used Pratley’s Ezee bond, applying one part to each mating surface before pressing them together.
For example, here is the base after screwing in the lightbulb and lightbulb fitting, but before gluing:
Figure: printed base of biltong dryer with light bulb and switch
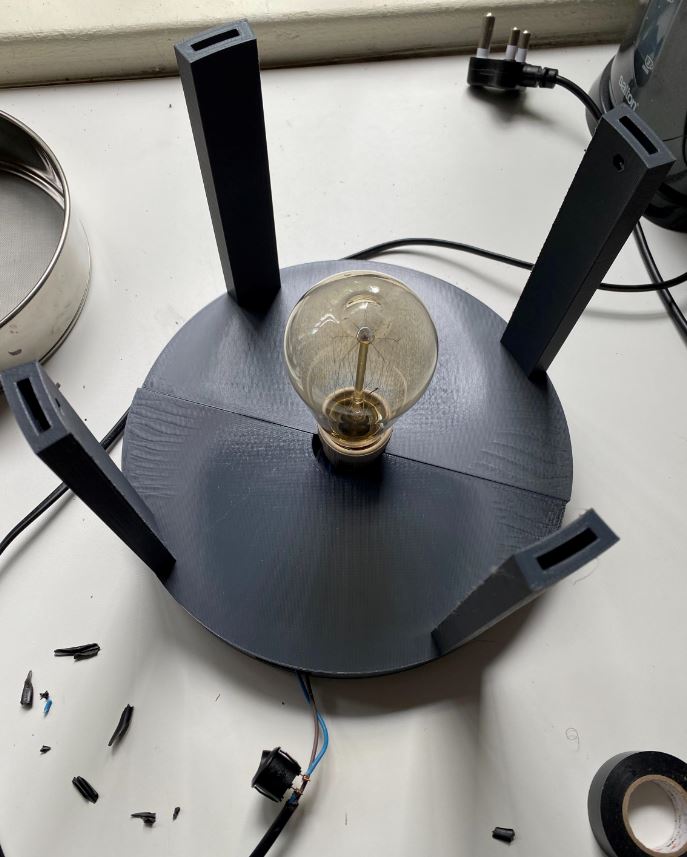
After gluing, it looks like:
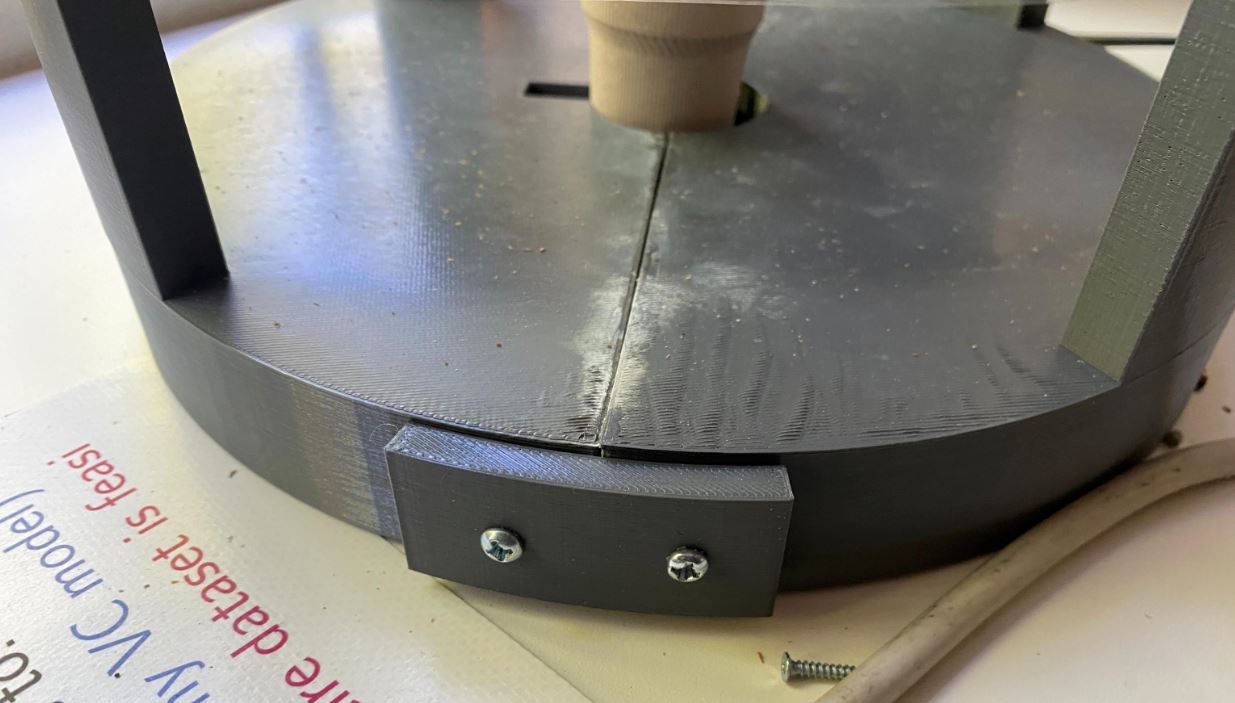
Because the base was so large and there was some warping during printing, I needed to further bond the two base halves together.
So, as you can see, I separately printed two small ~0.5cm width arc segment for each side.
These rested on the edge as in the image, and I screwed two M3 x 16mm self-taping screws through each arc segment into each side of the base as shown.
This, combined wit the glue, makes the base quite sturdy even though it was printed in halves.
5. Construction
After printing all the parts, we simply clip the base, middle, and top together and then further bolt them together using the M3 x 16mm screws and hex nuts with the provided holes in the supports at the top of each part.
Figure: full frame construction, showing base, middle, and top parts all printed and attached.
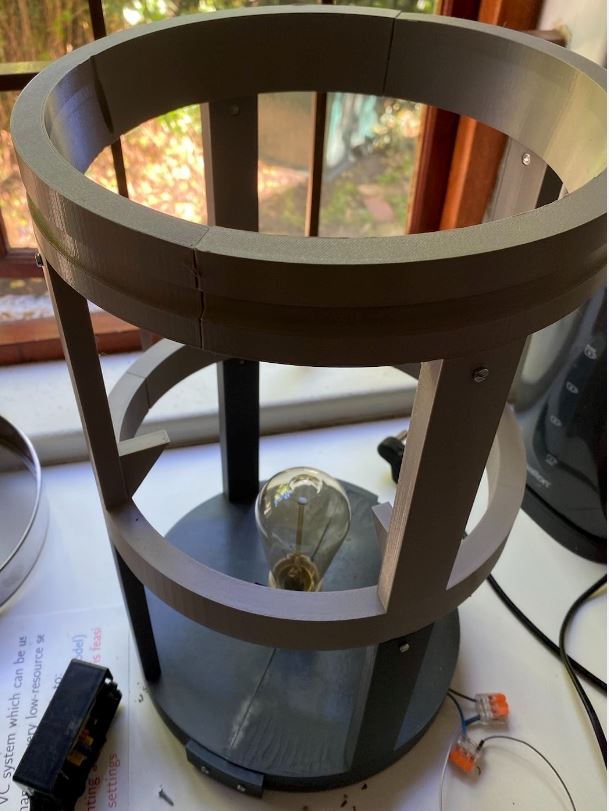
Construction tip: the insets in the vertical supports to clip the middle into the base and top are a perfect fit geometrically, but with printing tolerances it might not fit perfectly. I had to file the support extrusions (the thin extrusion that fits into the support inset in the base/middle) using a power file. A regular hand-file/sandpaper should also work, it might just take a bit longer.
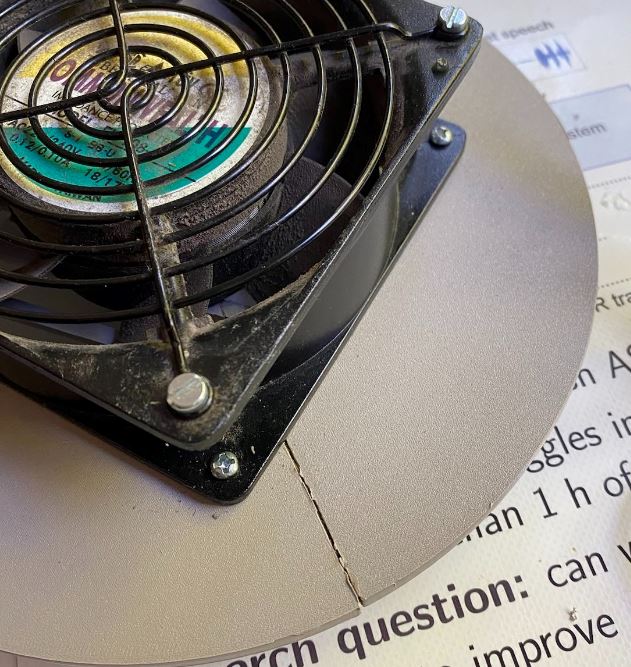
After the whole frame is constructed, we print the lid and screw the fan onto it:
Figure: biltong dryer lid from underneath.

The AC fan I used had 4 holes on each corner, allowing me to screw it into the lid and at the same time better affix the one lid half to the other. This is done again with the self-taping M3 x 16mm screws:
Figure: top of lid showing fan screwed into each lid half.
Putting everything together yields:
Figure: full biltong dryer not in use and without PVC binding to top.
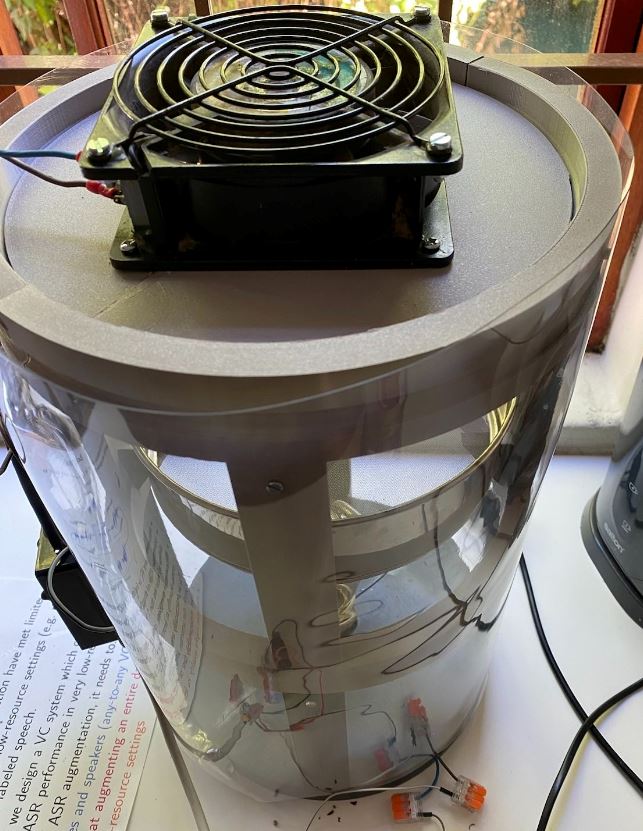
That’s it! The last thing is to bind the PVC cover to the top to ensure correct air flow – which one can do with a simple bungee cord.
6. Summary
The last thing is to then show it in action!
Figure: biltong dryer in use with ostrich biltong without lid.
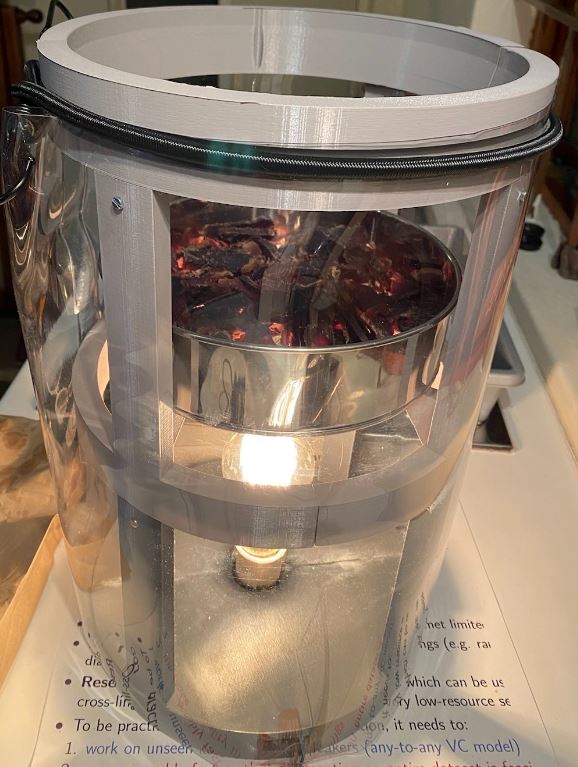
And the biltong money-shot:
Figure: biltong dryer in use from the top (without lid), showing ostrich biltong in the sieve

In the end, it was extremely tasty. Overall, the project was a success and the biltong is rapidly dried without cooking it, leaving it with a really great taste. If you want to try make one of these yourself, feel free to use the models provided or modify it to your use case.
The design is not perfect, and there is probably a bit of work that could be done on the electronics to neaten things up and mount the switch and a fan speed controller into a little attached electronics box. The bungee cord air sealing at the top is also not optimal and there are probably better ways to enforce correct air flow. However, the design is reasonably light weight, portable, and effective – so a success in terms of the design objectives!
I hope you enjoyed this little foray into home biltong dryers, and if you have any suggestions feel free to contact me on the about page.
Thanks for reading :)
tags: 3d printing - blender - biltong - cad - diy